Learn how to add retailers to your shopping center from EyeOn's library or create custom entries
What is the Add Retailer Feature?
The Add Retailer feature allows you to quickly add tenants to your shopping center directory. EyeOn maintains a comprehensive, curated library of national and regional retailers, making it easy to add established brands with pre-loaded information including logos, descriptions, and social media links.
If a retailer isn't found in the EyeOn library (such as local businesses or unique tenants), you can create a custom retailer entry with all the necessary information. New retailers you create are automatically added to the EyeOn library for future use by other centers.

Add retailer form for general retail stores
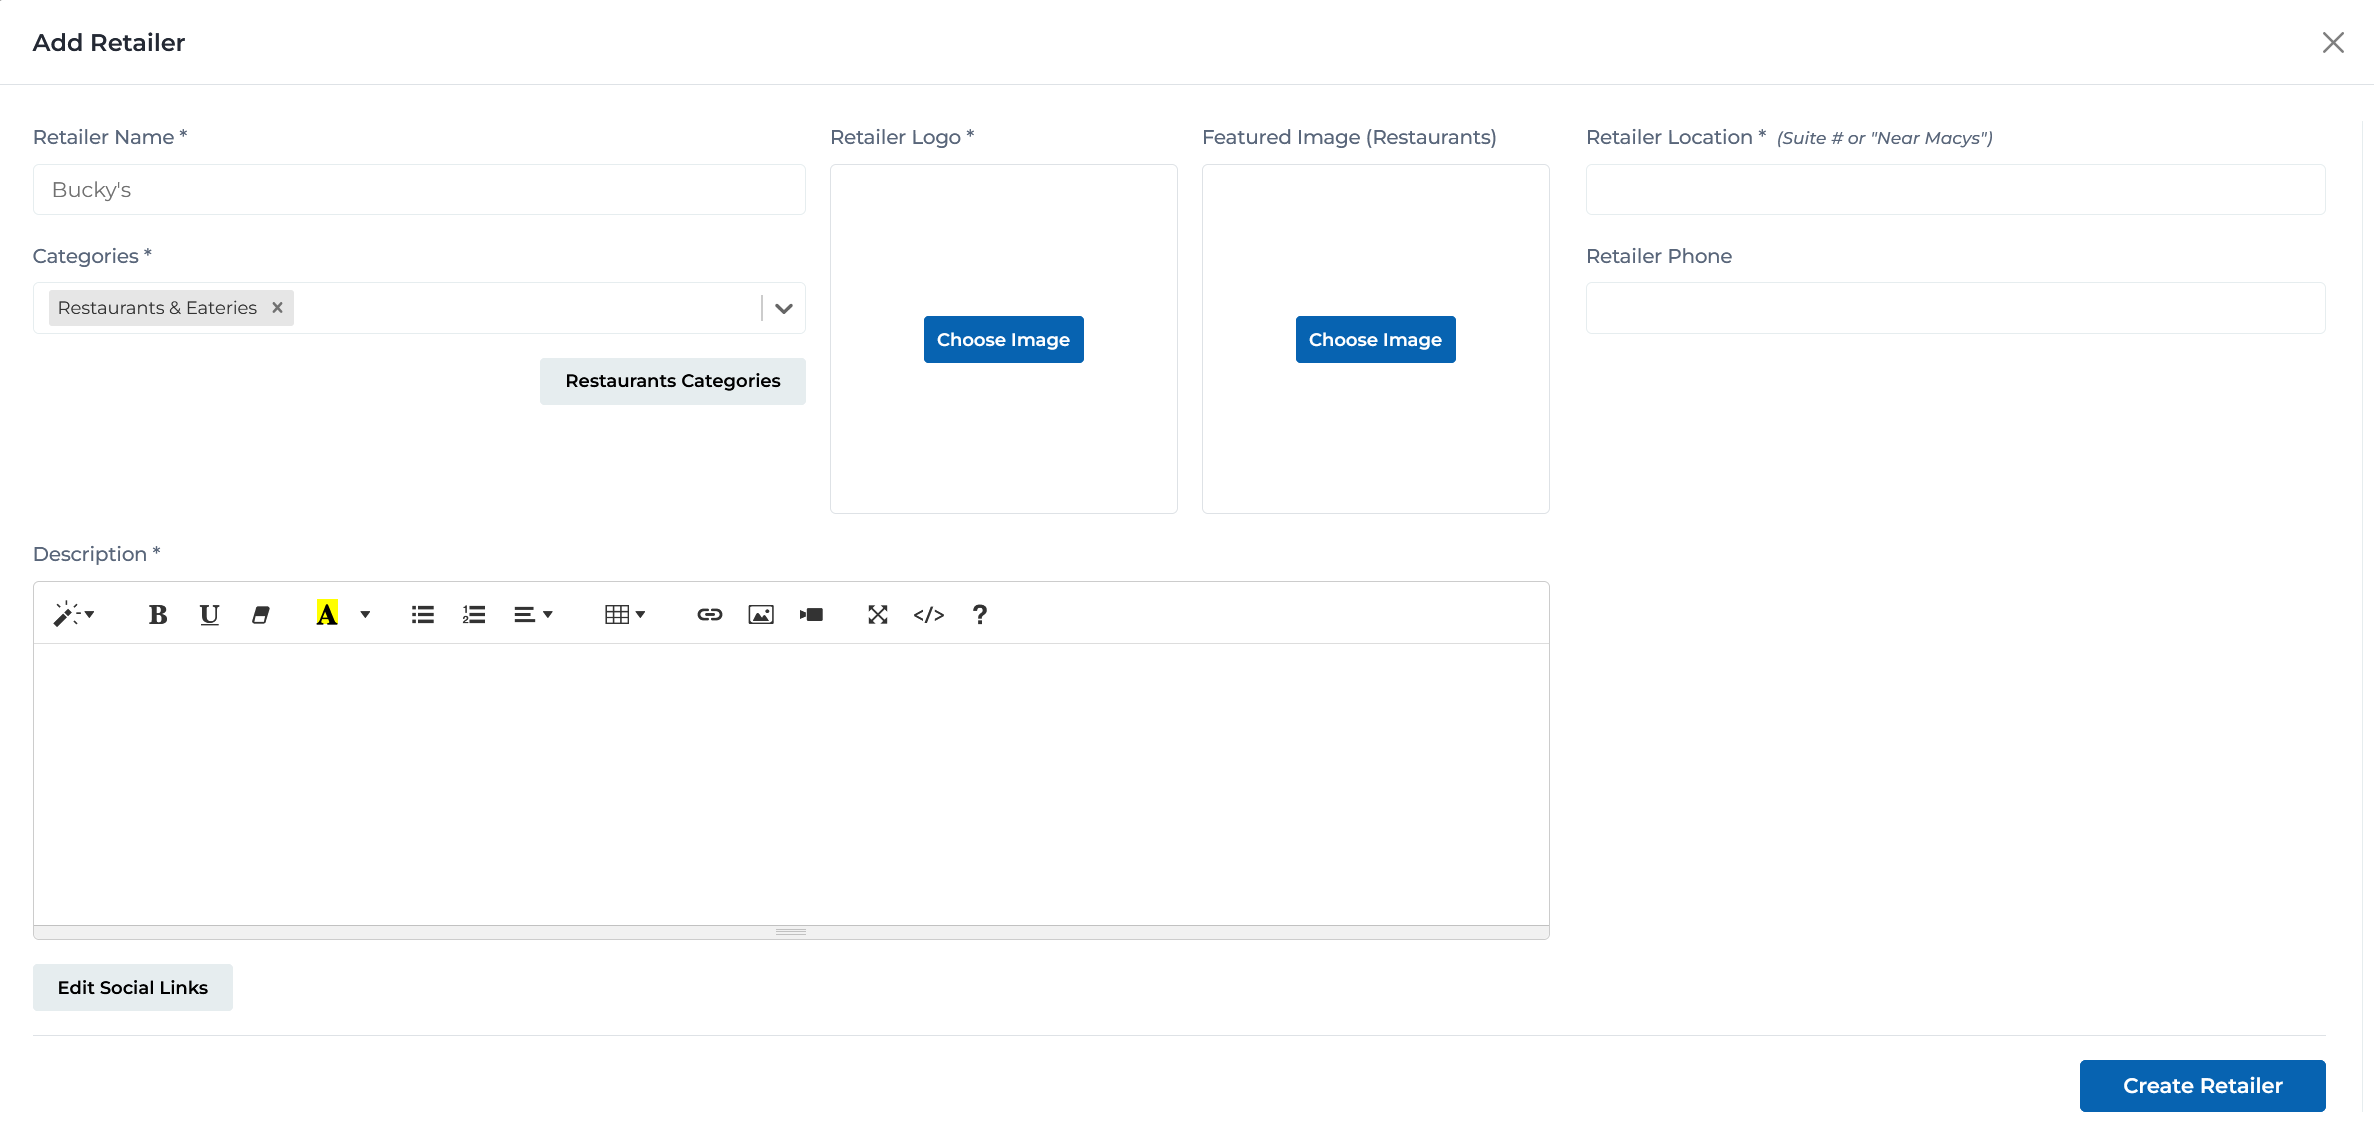
Add retailer form with restaurant-specific categories and fields
Key Features
Real-time search with autocomplete as you type retailer names
Access to EyeOn's extensive library of pre-loaded retailer information
Add retailers from library with just local information (location, phone)
Create new retailer entries for local or unique businesses
Library retailers include logos, descriptions, and social media links
New retailers you create are added to EyeOn's shared library
Adding a Retailer: Step-by-Step Process
The process differs slightly depending on whether the retailer exists in the EyeOn library or needs to be created from scratch:
- 1
Open Add Retailer Modal
Click the 'Add New Retailer' button on the Retailers page
Action:
A modal window opens with a search field
- 2
Search for Retailer
Start typing the retailer name in the search field
Action:
Real-time autocomplete suggestions appear as you type, showing matching retailers from the EyeOn library
- 3
Select Retailer
Click on the desired retailer from the search results
Action:
The Edit Retailer form opens with pre-loaded information (name, logo, categories, description, social links)
- 4
Add Local Information
Enter center-specific details:
Fields to Complete:
- • Retailer Location (required) - Suite number or location description (e.g., 'Suite 205' or 'Near Macy's')
- • Retailer Phone - Local store phone number
- • Additional Tags - Optional custom tags for filtering
- • Extra Local Description - Optional additional description specific to this location
- • Custom Flags - Optional flags for special features
- • Edit Retailer Hours - Set specific operating hours if different from center hours
- 5
Add Retailer to Center
Click the 'Add Retailer' button
Action:
The retailer is added to your center's directory with all library information plus your local details
- 1
Open Add Retailer Modal
Click the 'Add New Retailer' button on the Retailers page
Action:
A modal window opens with a search field
- 2
Search Attempt
Start typing the retailer name to check if it exists
Action:
If no matching results appear, the retailer is not in the EyeOn library
- 3
Open Creation Form
Click the 'Submit' button without selecting a retailer
Action:
The Create Retailer form opens with empty fields
- 4
Enter Required Information
Fill in all required fields marked with asterisks (*):
Fields to Complete:
- • Retailer Name * - Full business name
- • Retailer Logo * - Upload a high-quality logo image
- • Retailer Location * - Suite number or location description
- • Categories * - Select appropriate retail category from dropdown
- • Description * - Rich text description of the retailer's offerings and services
- 5
Enter Optional Information
Add optional details to enhance the retailer profile:
Fields to Complete:
- • Retailer Phone - Store phone number
- • Additional Tags - Custom tags for filtering and organization
- • Edit Social Links - Add website and social media links
- • Edit Retailer Hours - Set specific operating hours
- • Custom Flags - Special features or attributes
- 6
Create Retailer
Click the 'Create Retailer' button
Action:
The retailer is added to your center AND to the EyeOn library for future use by all centers
Required Fields for New Retailers
When creating a new retailer entry, the following fields must be completed:
Retailer Name
*The official business name of the retailer
Example:
Macy's, Apple Store, Joe's Coffee Shop
Tips:
- • Use the official brand name
- • Include proper capitalization
- • Avoid abbreviations unless part of the official name
Retailer Logo
*A clear, high-quality logo image representing the retailer
Example:
Square logo file (PNG or JPG), minimum 500x500 pixels recommended
Tips:
- • Use high-resolution images for best display quality
- • Square aspect ratio works best
- • Transparent background (PNG) is ideal
- • File should be under 5MB
Retailer Location
*The specific location within your shopping center
Example:
Suite 205, Near Food Court, Second Floor by Macy's
Tips:
- • Include suite or unit numbers when available
- • Use landmark descriptions for kiosk locations
- • Be specific enough for visitors to find the store
Categories
*The primary retail category that best describes the business
Example:
Fashion & Apparel, Electronics, Fine Dining
Tips:
- • Choose the most relevant category
- • Use Restaurant Categories for food establishments
- • Multiple categories can be assigned
- • Proper categorization improves filtering and search
Description
*A detailed description of the retailer's products, services, and offerings
Example:
See Macy's example: fashion brands, beauty products, home goods
Tips:
- • Include product lines and services offered
- • Mention notable brands or specialties
- • Use the rich text editor for formatting
- • Keep descriptions informative but concise
- • Highlight what makes this retailer unique
Optional Features & Enhancements
Additional information that can enhance retailer profiles:
Add the retailer's website and social media profiles
- • Website URL
- • Facebook page
- • Instagram profile
- • Twitter/X account
- • Other social platforms
Set specific operating hours if different from center hours
- • Regular hours by day of week
- • Holiday hours
- • Special event hours
- • Seasonal hour changes
Custom tags for better organization and filtering
- • Featured retailer
- • New arrival
- • Seasonal
- • Local business
- • Kids friendly
Special attributes or features
- • Pet friendly
- • Wheelchair accessible
- • Free WiFi
- • Curbside pickup
- • Online ordering
Additional information specific to this location
- • Local manager information
- • Location-specific services
- • Parking information
- • Special local offerings
Best Practices
Using the EyeOn Library
- • Always search the library first before creating new entries
- • Library entries include verified logos and descriptions
- • Pre-loaded social media links save time and ensure accuracy
- • Use exact brand names for best search results
- • If you find a similar retailer, consider if it's the same brand
Creating Quality Entries
- • Upload high-resolution, clear logos for professional appearance
- • Write detailed, informative descriptions
- • Include all available contact information
- • Add social media links to help customers connect
- • Use accurate categorization for better discoverability
- • Verify all information before clicking Create Retailer
Location Information
- • Be specific with suite numbers and floor locations
- • Use recognizable landmarks when describing locations
- • Consider how information appears on kiosks and wayfinding
- • Update location information if retailers move within the center
- • Include directional hints for hard-to-find locations
Ready to Add Retailers?
Access the Portal CMS to start adding retailers to your shopping center directory.
Access Portal CMS